
Step-by-Step Repair Process
Fix Worn Areas
If the synthetic leather is only worn but not torn, lift the worn flaps gently and apply a bit of synthetic leather glue underneath. Press them into place carefully. Use the eyeliner pencil to fill in any white or faded spots for a more even look.
Add a Protective Layer
Use a paintbrush to apply a second, thin coat of synthetic leather glue over the treated areas. Let this layer dry for 20 minutes.
Fill in Missing Pieces
For spots where synthetic leather is missing entirely, cut a small piece of EVA foam to fill the area. Cover the foam with a clean brush to blend it into the surface. Once dry, paint over the area with fabric varnish that matches your item’s original color. Allow to dry thoroughly.
Seal the Repair
After a couple of hours, apply either another coat of synthetic leather glue or a layer of clear nail polish to seal and protect the repaired sections.
Reduce Shine
If the repaired sections appear shinier than the surrounding material, lightly dust the area with talcum powder to tone it down and help it blend.
Helpful Tips
Test First: Always try your materials on a small, hidden part of the leather object to ensure compatibility.
Ventilation is Key: Perform all steps in a well-ventilated area to avoid inhaling fumes.
Dry Completely: Ensure the item is completely dry before putting it back to regular use.
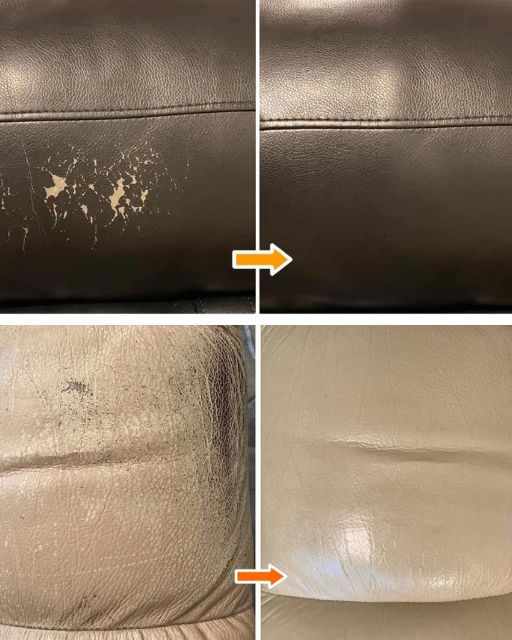
Final Thoughts
With these simple steps and affordable tools, you can extend the life of your synthetic leather items and enjoy them for years to come. No need to throw away your favorite pieces when you can restore their original look and feel at home.
Step-by-Step Repair Process
Fix Worn Areas
If the synthetic leather is only worn but not torn, lift the worn flaps gently and apply a bit of synthetic leather glue underneath. Press them into place carefully. Use the eyeliner pencil to fill in any white or faded spots for a more even look.
Add a Protective Layer
Use a paintbrush to apply a second, thin coat of synthetic leather glue over the treated areas. Let this layer dry for 20 minutes.
Fill in Missing Pieces
For spots where synthetic leather is missing entirely, cut a small piece of EVA foam to fill the area. Cover the foam with a clean brush to blend it into the surface. Once dry, paint over the area with fabric varnish that matches your item’s original color. Allow to dry thoroughly.
Seal the Repair
After a couple of hours, apply either another coat of synthetic leather glue or a layer of clear nail polish to seal and protect the repaired sections.
Reduce Shine
If the repaired sections appear shinier than the surrounding material, lightly dust the area with talcum powder to tone it down and help it blend.
Helpful Tips
Test First: Always try your materials on a small, hidden part of the leather object to ensure compatibility.
Ventilation is Key: Perform all steps in a well-ventilated area to avoid inhaling fumes.
Dry Completely: Ensure the item is completely dry before putting it back to regular use.
Final Thoughts
With these simple steps and affordable tools, you can extend the life of your synthetic leather items and enjoy them for years to come. No need to throw away your favorite pieces when you can restore their original look and feel at home.
