
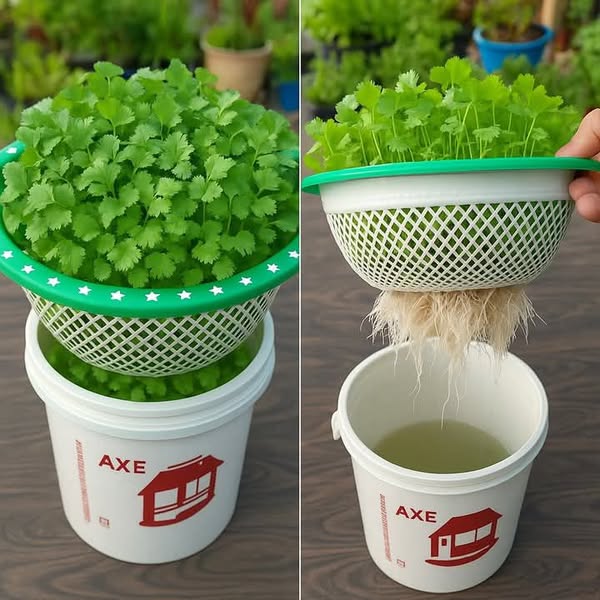
In today’s world, where food security, sustainability, and healthy living have become top priorities, home gardening is gaining popularity. Among the many gardening methods available, hydroponics stands out as a clean, efficient, and space-saving technique for growing plants without soil. Whether you live in a small apartment or want to grow fresh herbs year-round, hydroponics offers a practical solution. In this article, we will guide you step-by-step on how to grow fresh herbs at home using a simple hydroponic system like the one shown in the image above.
What is Hydroponics?
Hydroponics is a method of growing plants using a water-based nutrient solution instead of soil. In this system, plants get their essential nutrients directly from the water, which is enriched with fertilizers or natural ingredients. Hydroponics allows for faster growth, higher yields, and efficient use of water and space.
Benefits of Home Hydroponic Gardening
Before diving into the process, here are some key benefits of hydroponic gardening at home:
-
No Soil Required: Reduces mess and eliminates soil-borne pests and diseases.
-
Space-Saving: Perfect for small spaces like balconies, kitchens, or rooftops.
-
Water Efficiency: Uses 70–90% less water compared to traditional gardening.
-
Faster Growth: Plants often grow faster due to direct nutrient absorption.
-
Fresh Harvests: You can enjoy fresh herbs like cilantro, basil, mint, or lettuce any time of the year.
Materials Needed
To replicate the simple hydroponic system in the image, gather the following materials:
-
Plastic container or bucket (around 5 liters or more)
-
Plastic mesh basket or colander
-
Herb seeds (e.g., cilantro, basil, mint)
-
Coconut coir or sponge for germination
-
Hydroponic nutrient solution (optional but recommended)
-
Water (preferably filtered or rainwater)
-
Light source (sunlight or LED grow lights)
Step-by-Step Guide to Building Your Hydroponic Herb Garden
Step 1: Prepare the Container and Basket
-
Choose a clean plastic bucket or container that can hold enough water to nourish the roots.
-
Select a mesh basket or colander that fits snugly on top of the container. This will hold the growing medium and the herb plants while allowing the roots to hang freely into the water below.
Step 2: Germinate the Seeds
-
Soak your herb seeds in water overnight to encourage sprouting.
-
Use a damp sponge, paper towel, or coconut coir in a small tray to start the germination.
-
Keep the seeds in a warm, dark place for a few days until they sprout small roots and shoots.
Step 3: Transfer Seedlings to the Basket
-
Once the seedlings have small roots (about 1–2 inches long), gently place them in the mesh basket.
-
Use coconut coir, perlite, or another lightweight medium to support the seedlings in the basket.
-
Ensure that the roots can grow down through the holes into the water.
Step 4: Add Water and Nutrients
-
Fill the bottom container with clean, room-temperature water.
-
Mix in a small amount of hydroponic nutrient solution according to package instructions.
-
The water level should be high enough to touch the roots but not submerge the base of the plant stems.
Step 5: Provide Light
-
Place the system in a location where it receives at least 6 hours of sunlight per day.
-
If natural light is limited, use an LED grow light to ensure proper growth.
-
Maintain a temperature range of 18–25°C (64–77°F) for best results.
Step 6: Monitor and Maintain
-
Check water levels daily. Add more water as needed.
-
Change the water every 7–10 days to prevent algae and maintain fresh nutrients.
-
Prune the herbs regularly to encourage bushier growth and harvest leaves as needed.
